Up Time VPN installation for MacOS
I. Quick Download Link
If you really know what you are doing: our approved version of Tunnelblick for MacOS
II. Install Tunnelblick Software
A. MacOS Version
In general keep your MacOS fully updated and as a rule of thumb, if your MacOS is 4 years old or newer you are probably fine. Tunnelblick has been pretty good at supporting older versions.
B. Download Tunnelblick from our approved version
Download our approved Disk Image (.dmg) file
C. Open the Tunnelblick Disk Image (.DMG)
Double click the disk image you downloaded and inside is the Tunnelblick Installer App. Double click the installer icon.
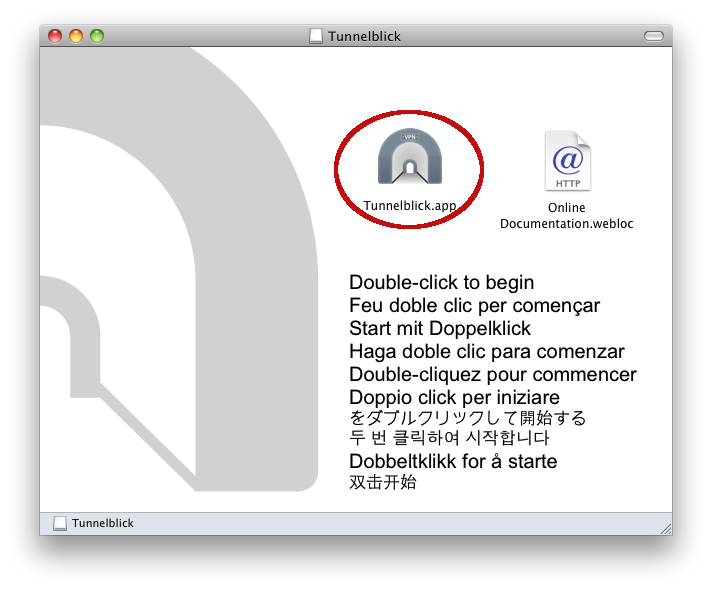
D. Installation
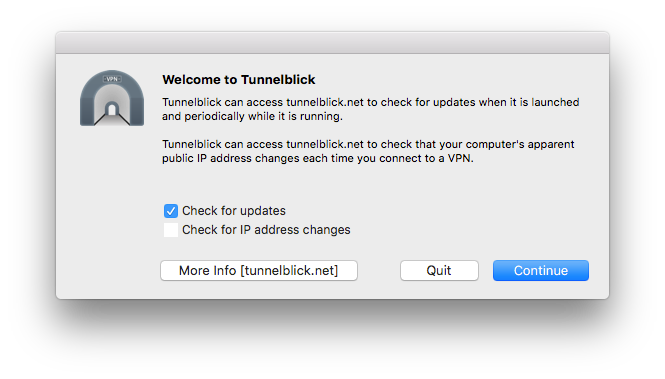
The installer will ask for your local Mac OS password a few times and ask a few questions:
- Check for update? Check box
- Check for IP address change? Uncheck box
And finally, it will ask you if you have configuration files. Answer Yes. (see next step to acquire those)
III. Configure and download a VPN connection Set
A. Go to the web management page of your ISF. If you don't know where to find the web management page of your firewall, orthe admin password to access it, please call us for support:
(206) 547-1817
B. Assign or Replace an Owner on a VPN Connection
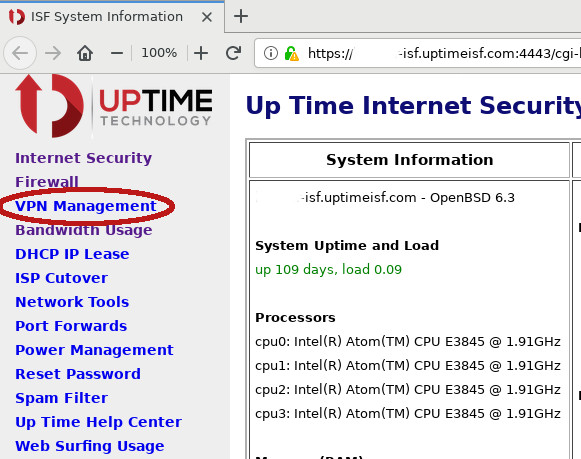
On the ISF main page, click on the VPN Management link on the left navigation
column.
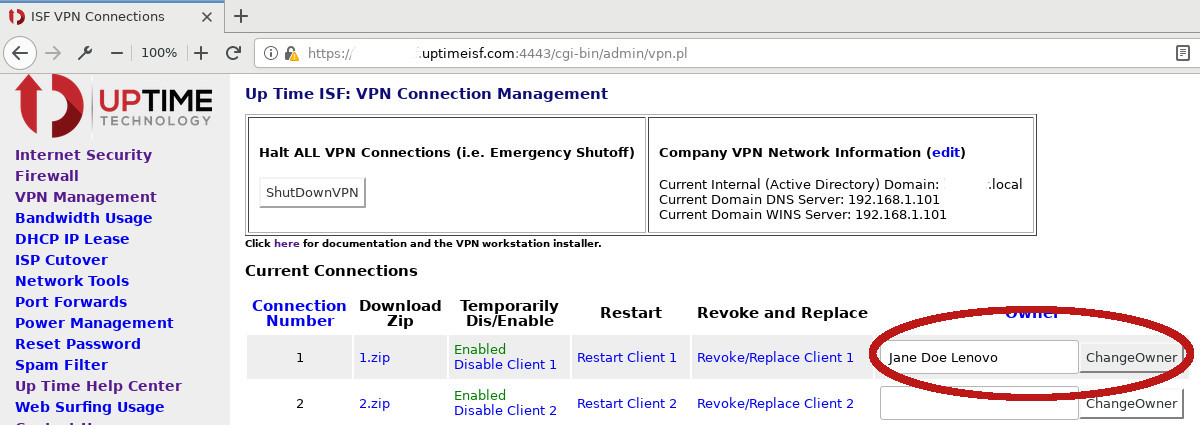
You will see a list of available client connections (by number). If
this is a new connection, find a connection where the Owner field is
blank. If you are replacing a connection, delete the current
information in the Owner field. Enter BOTH name of the person and the
type of machine they will be using. For example:
Jane Doe Lenovo
or
John Smith Dell Home Desktop
Click the Change Owner button.
This is a crucial step. If that machine is stolen or compromised, we
can revoke that one connection and everyone can continue to work. If
we are unsure which connection was compromised, we will have to revoke
ALL of them immediately (potentially cutting people off
mid-connection) and then re-issue certificates to everyone.
(Table of Contents)
C. Revoke/Replace the certificates/keys
ALWAYS Revoke/Replace, even if this is just replacing the same
connection (say due to re-installing the OS of a laptop). The
certificates have a 3 year life time and Revoking/Replacing resets
that clock every time. Even on a new install, Revoke/Replace as you
often don't know how old the initial certificates are. Additionally,
Revoke/Replace locks out any stray certificates, which is always a
good thing.
D. Create a Connection Password!
It is vital in protecting the office servers and client and financial data to createa connection password. If this computer/laptop is stolen or compromised, the thieves/hackers
can simply copy your connection information to their machine and immediately access the
office network and data. This is true even if they don't know your Windows Login password.
It is crucial to your office securiy to put a connection password on this VPN.
If you do not want to set a password, then skip to E: Download and Unzip
Underneath the zip download link click the "Set Password" or
"Change Password" (depending if the connection has a password or
not):
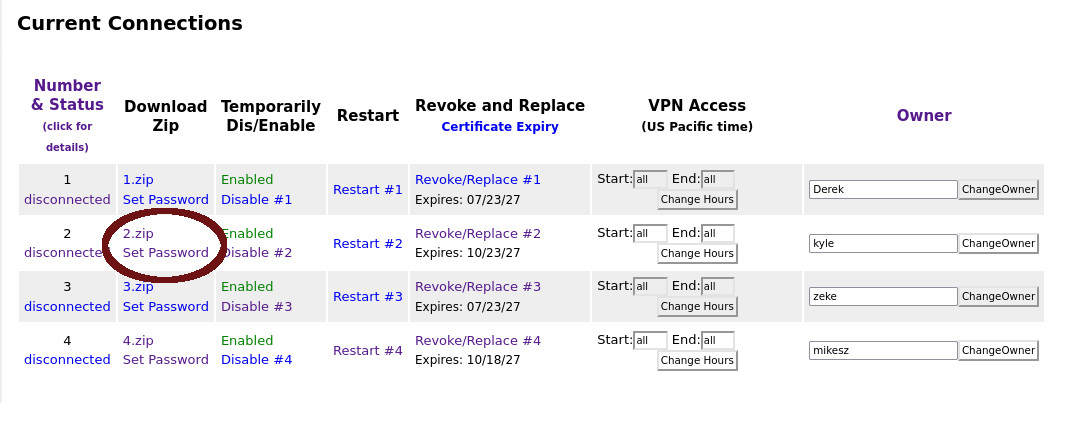
You then have two options. You can create the password for the user and then tell them. NOTE! They cannot change it once it is assigned, only an ISF Firewall Admin can initiate a password request.
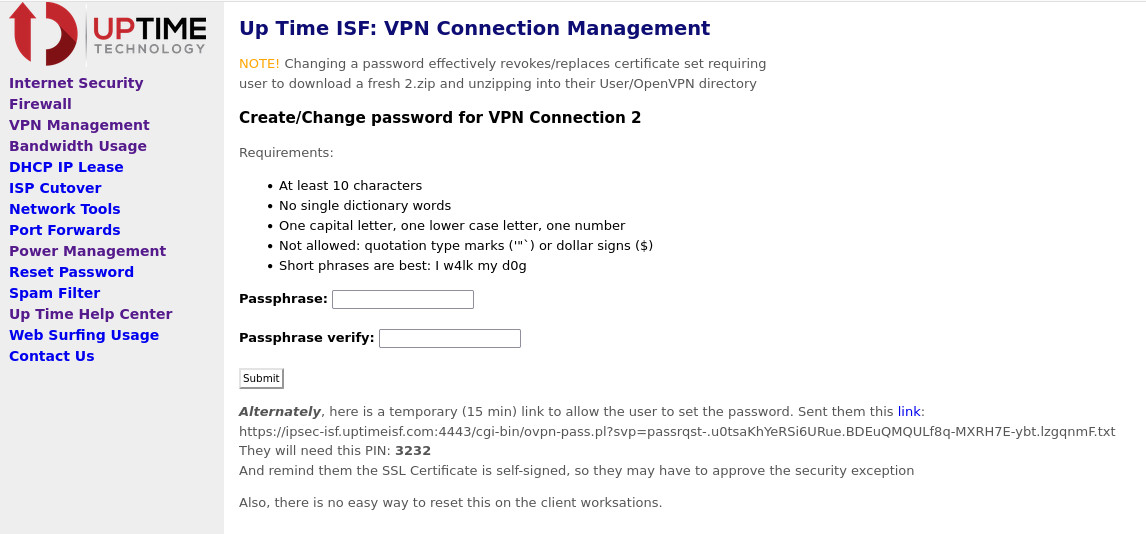
Or you can cut-and-paste the link provided and email the user (or
put it in their browser if you are on a remote session with the
final end user). They will need the PIN, do not send the PIN and
the link in a email. If you email the link, then text or voice
call them with the PIN. They can then fill out the password form
themselves. This is the preferred method as their password is then
private.
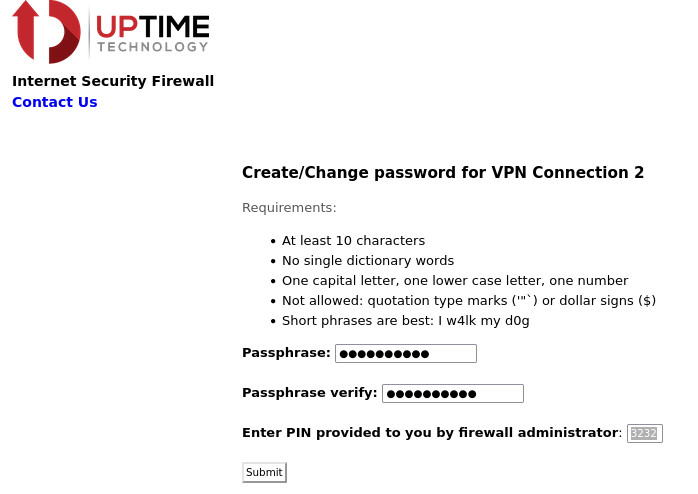
If that is successful then they will be given a download link for the certificate bundle and can follow the directions in the Unzip
section below.
E. Download and Unzip
- Click on the zip link. That will download the zip file to your Mac
- Double click the X.zip (1.zip for example) that you just downloaded, and a blue file folder with the same name ('1' in this example) will appear.
- RIGHT click the blue folder and choose Rename. Rename the folder something helpful that includes the number, the company, and add the .tblk extention: 1mycompany.tblk for this example
- A window will pop up asking if you really want to Add the extention. Click Add. The icon will change to a Tunnelblick icon.
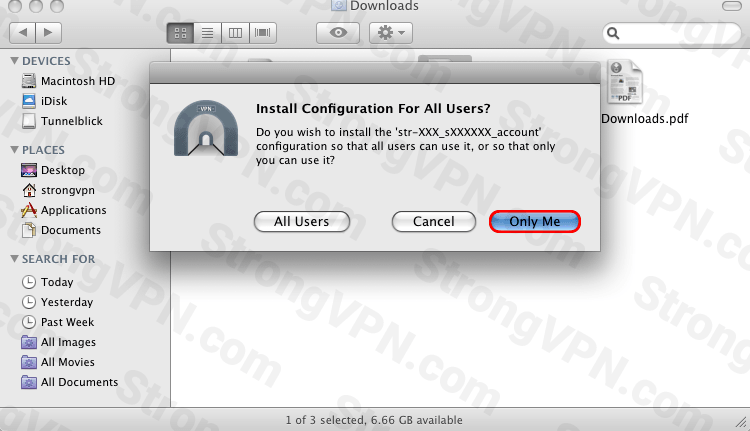
- Double click the Tunnelblick icon and install for "Only Me".
E. Connect!
You've completed the installation and configuration of Tunnelblick
To connect, look for the Tunnelblick icon in the top right corner of your desktop, near the clock. You can click on it and choose to connect to the VPN you just named (whatever you put in for '1mycompany')
